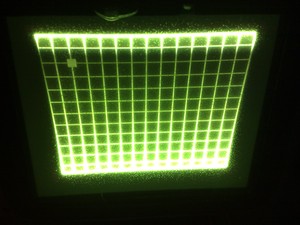
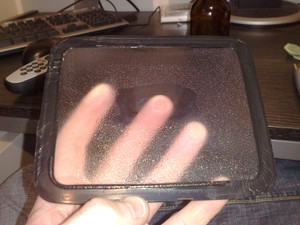
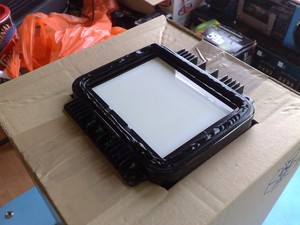
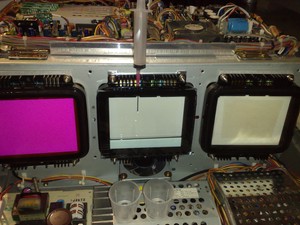
This Green CRT has "tube fungus"real good and is a great clear example. Firstly the tube needs to come out of the projector, but I am not talking you though that, right the tubes out and needs to be emptied of Glycol. |
 |
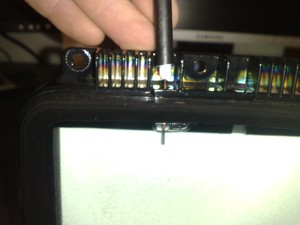
On the top of the Alu frame are 2 screws remove both not losing the little orange seals and keep tube upright, get a stiff bit of wire and poke thought both now screw-less screw holes, on my (this) green tube one poked went though no problem, the second was a real pain I really had to push hard and then it went in pushing a load of crud with it, I used a bit of 1.5mm wire (center of aireal coax cable) to clear the holes. That screw hole is clear. |
 |
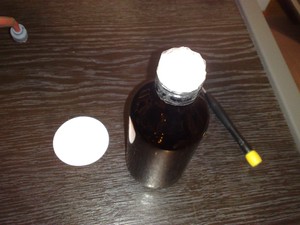
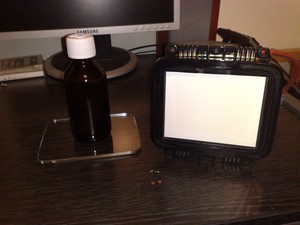
Now both filling holes are clear, empty the coolant into a small dish allowing air to get in one of the holes every now and then ells it will not flow out, once emptied pore or syringe the Glycol though a filter (coffee filter) atached to the top of a clean empty bottle with tape. Note you will only need a small part of the filter ells you will end up with no Glycol as its all get soaked up by the coffee filter. Bottle with filter poked in and taped on. |
 |
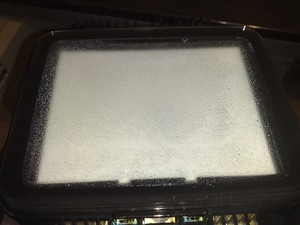
Right now comes the fun part removing the glass front plate, this is a real bugger to do but a bit of perseverance and you’ll get it off fine, use a Stanly knife and start to gently press into the sealant and slowly cut it right though, very slowly indeed as you also don’t want to brake the tube its self from the force of cutting though the sealant as then its game over (buy a new projector, its easier than finding a new blue SD-187B CRT) while cutting try to keep the knife blade towards the glass so you don’t cut / slice the black paint of the Alu frame in the coolant chamber as this will then need to be painted to stop the fungus coming back. Showing how bad the buildup was. |
 |
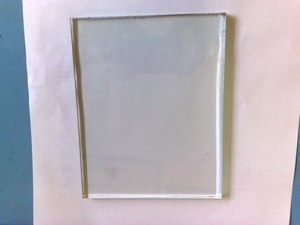
Once glass plate has been cut off use a brand new knife blade (out of the knife handle) and while running the glass plate under water slice / remove all traces of the old sealant from the glass plate, also gently scrape the crudd buildup off the glass, or use a scourer sponge, till its all nice and clean, using water helps stop the blade from scratching the glass. Showing buildup on glass plate alone. |
 |
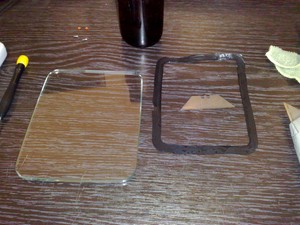
Glass plate all clean and old sealant sliced off and blade used to do it. |
 |
Now remove as much of the old sealant from tube frame as you can without taking the paint off, you should find a particular blade angle and blade pressure that works really well, I know I did , once sealant is off use the wet scourer pad on the tube face front to remove the crud buildup on there too, also I find a stiff brush like a tooth brush good to clean the crud from the gaps around the Alu tube framet, if you come across a spot where the frame metal looks eaten away clean as much as possible removing any lose corrosion etc, this will need to be painted over to stop the fungus reforming Dry the tube well, try not to soak the deflection yoke (DY) etc, if you do allow it to dry on top of boiler / radiator for a couple of days. |
 |
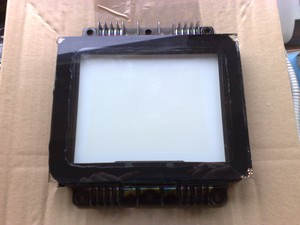
If you have to paint the frame / areas of corrosion mask the tube face with masking tape and I personally found Cellulous car paint in black gloss (Toyota 202 standard black non metallic) to be perfect, give it a few 3 – 4 coats allowing 15 mins between each coat and that will cover the exposed bare metal, note also mask the frame where the sealant was as you don’t need to pain that, and also when spraying try to spray behind the metal lip to help seal the corroded metal in paint, you know what I mean if / when you do it. Once all the paint etc has dried remove tape used to cover the tube face from spray paint and using a knife scrap away any covering the tube face if some did manage to get on face , its an awkward shape to mask, once all done give it a nice buff with a cloth soaked in some sort of solvent to remove any glue deposit left on tube face by the masking tape and then get a paintbrush and remove any paint flakes stuck behind the inner of the metal lip / edge (so it will not float inside once chamber is fitted and filled up) and |
No picture but it got a coat of paint as mine was corroded, camera took very blury picture which looked fine on its small screen but it was not ! |
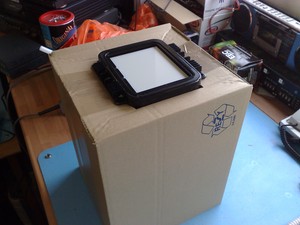
Give tube face a nice buff with lint free cloth, place in a card board box with a hole cut out in it to hold the tube face up, also put a brick or something weighty in the bottom of the box to stop it falling over, this will aid in squirting the sealant around as you need steady hands. |
 |
Now get your sealant and judge the amount you need to squirt on from the amount that was scrapped off, I used a 5mm wide and tall worm / trail all the way round the edge of the Alu frame, I tended to keep to the inner edge (chamber side) but not too far just off centre of the frame so that when the glass is placed on and pushed not too much went towards the inside of the chamber and enough came out the gap to the outer edge. |
 |
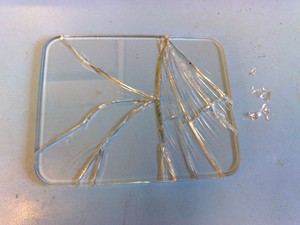
Before putting the glass on buff the inside chamber side with a lint free cloth, but while buffing it up don’t let it jump out of your hands and hit the floor or you’ll do this. One word sums that up and that word begins with F and ends with K ! |
 |
Right off to my local glass supplier to get a bit of 140mm x 110mm x 6mm thick CLEAR glass not tinted ! There is plenty of room around the tube so the physical glass size was not too important so the non rounded corners do not pose a problem on the VPH-1000, the thickness will need to be 6mm as the lenses are air coupled and reflections may occur. Now were back on track with a new bit of glass. |
 |
Place the glass onto the bed of sealant then gently press down evenly, the aim here is to get a nice seal and not to push all the sealant out / into the coolant chamber as this may cover parts of the tube face, also make sure the Glycol filling screws are out ells when you push the plate down the air trapped inside the chamber blows a hole though the sealant as it tries to get out. Idealy the sealant needs to be about 1.5 – 2 mm thick between the Alu frame and glass plate all round, not to worry to much if its not that thick as your have some coolant left over, but too thick and you will need extra coolant, leave for 24 hours before moving / rough handling. |
 |
I left mine tubes for a couple of days to fully cure, then using the syringe refilled with my filtered Glycol, I did have a tiny bit left over from green tube which was not a problem at all, and I was a little short on the blue (only 2ml) so I used some deminieralized / deironised water this again will not cause any problem as it has nothing in it, DON’T use just tap water as it has Fluoride and other stuff in it which may deposit on the glass and remember to leave an air bubble to help with the expansion when it Glycol warms up. Screw the chamber refill / empty screws in, don’t over tighten ells the orange rubber seals will crack / get torn, refit CRT back in projector. |
 |
Fit everything back, I actually removed the wires forn the tube and marked where they went on a bit of paper save undoing all the wiring llom to unplug. Use test pattern to adjust mechanical (lens) focus and maybe electrical if you’ve twiddled the pot on focus block, adgust convergence as that will of changed. Hopefully your now have a perfect picture and no leaks. Happy projecting. |
 |
Toy Story 2 using a burnt blue tube you can see the smaller 4:3 ware insdie the now large 4:3 image, ignore the curvature of the picture I had not set it up properly as I was moving it once repaired. |
 |